Activate Alignment Editor: Tap on
Floor Directions: The Alignment Notation pad shows the floor directions on the dance floor. The top direction is "Line-of-Dance" (LOD). The left side is "Center" and right is "Wall". The eight arrow heads at the outer edge show the eight floor directions. Counter-clock-wise these are: Face LOD; Face Diagonal Center; Face Center; Back Diagonal Wall; Back LOD; Back Diagonal Center; Back Center; Face Diagonal Wall.
Dancers on the Floor: The dancers are positioned on the dance floor at the start relative to each other and with respect to the LOD, Wall, and Center. As the dance figure progresses, the app calculates and displays the relative positions of the dancers in the alignment column by blue (leader) and red (follower) heads. Follow at any step.
Change Start Directions: There are two ways to align the dancers at start. The first is most common option.
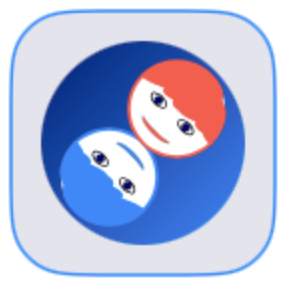
(i) Tap on the heads on right of the Alignment Notation pad. A pop-up menu shown in Figure 1 appears
with a list of common alignment options. There are three up arrow heads at the bottom of the menu,


(ii) Tap on blue
(iii) Repeat step (i) above. Tap on one of the listed alignment positions.
|
|
|
|---|---|---|
| Figure 1 | Figure 2 | Figure 3 |
Align Dancers during the Dance Figure: The dancer alignments are calculated by the app based on the alignments of the start step and notations. But the dance teacher often gives instruction like "Reach Promenade Position after 3 steps." Because of the variations in step size, directions, and the human adjustments it may be difficult to write exactly matching notation to reach the instructed position. The app provides a way to correct the alignments at any step of the dance figure. Follow the step below.
(i) Select a step by tapping on the row of the staff. The dancers will reach the teacher-instructed alignment at the completion of this step.
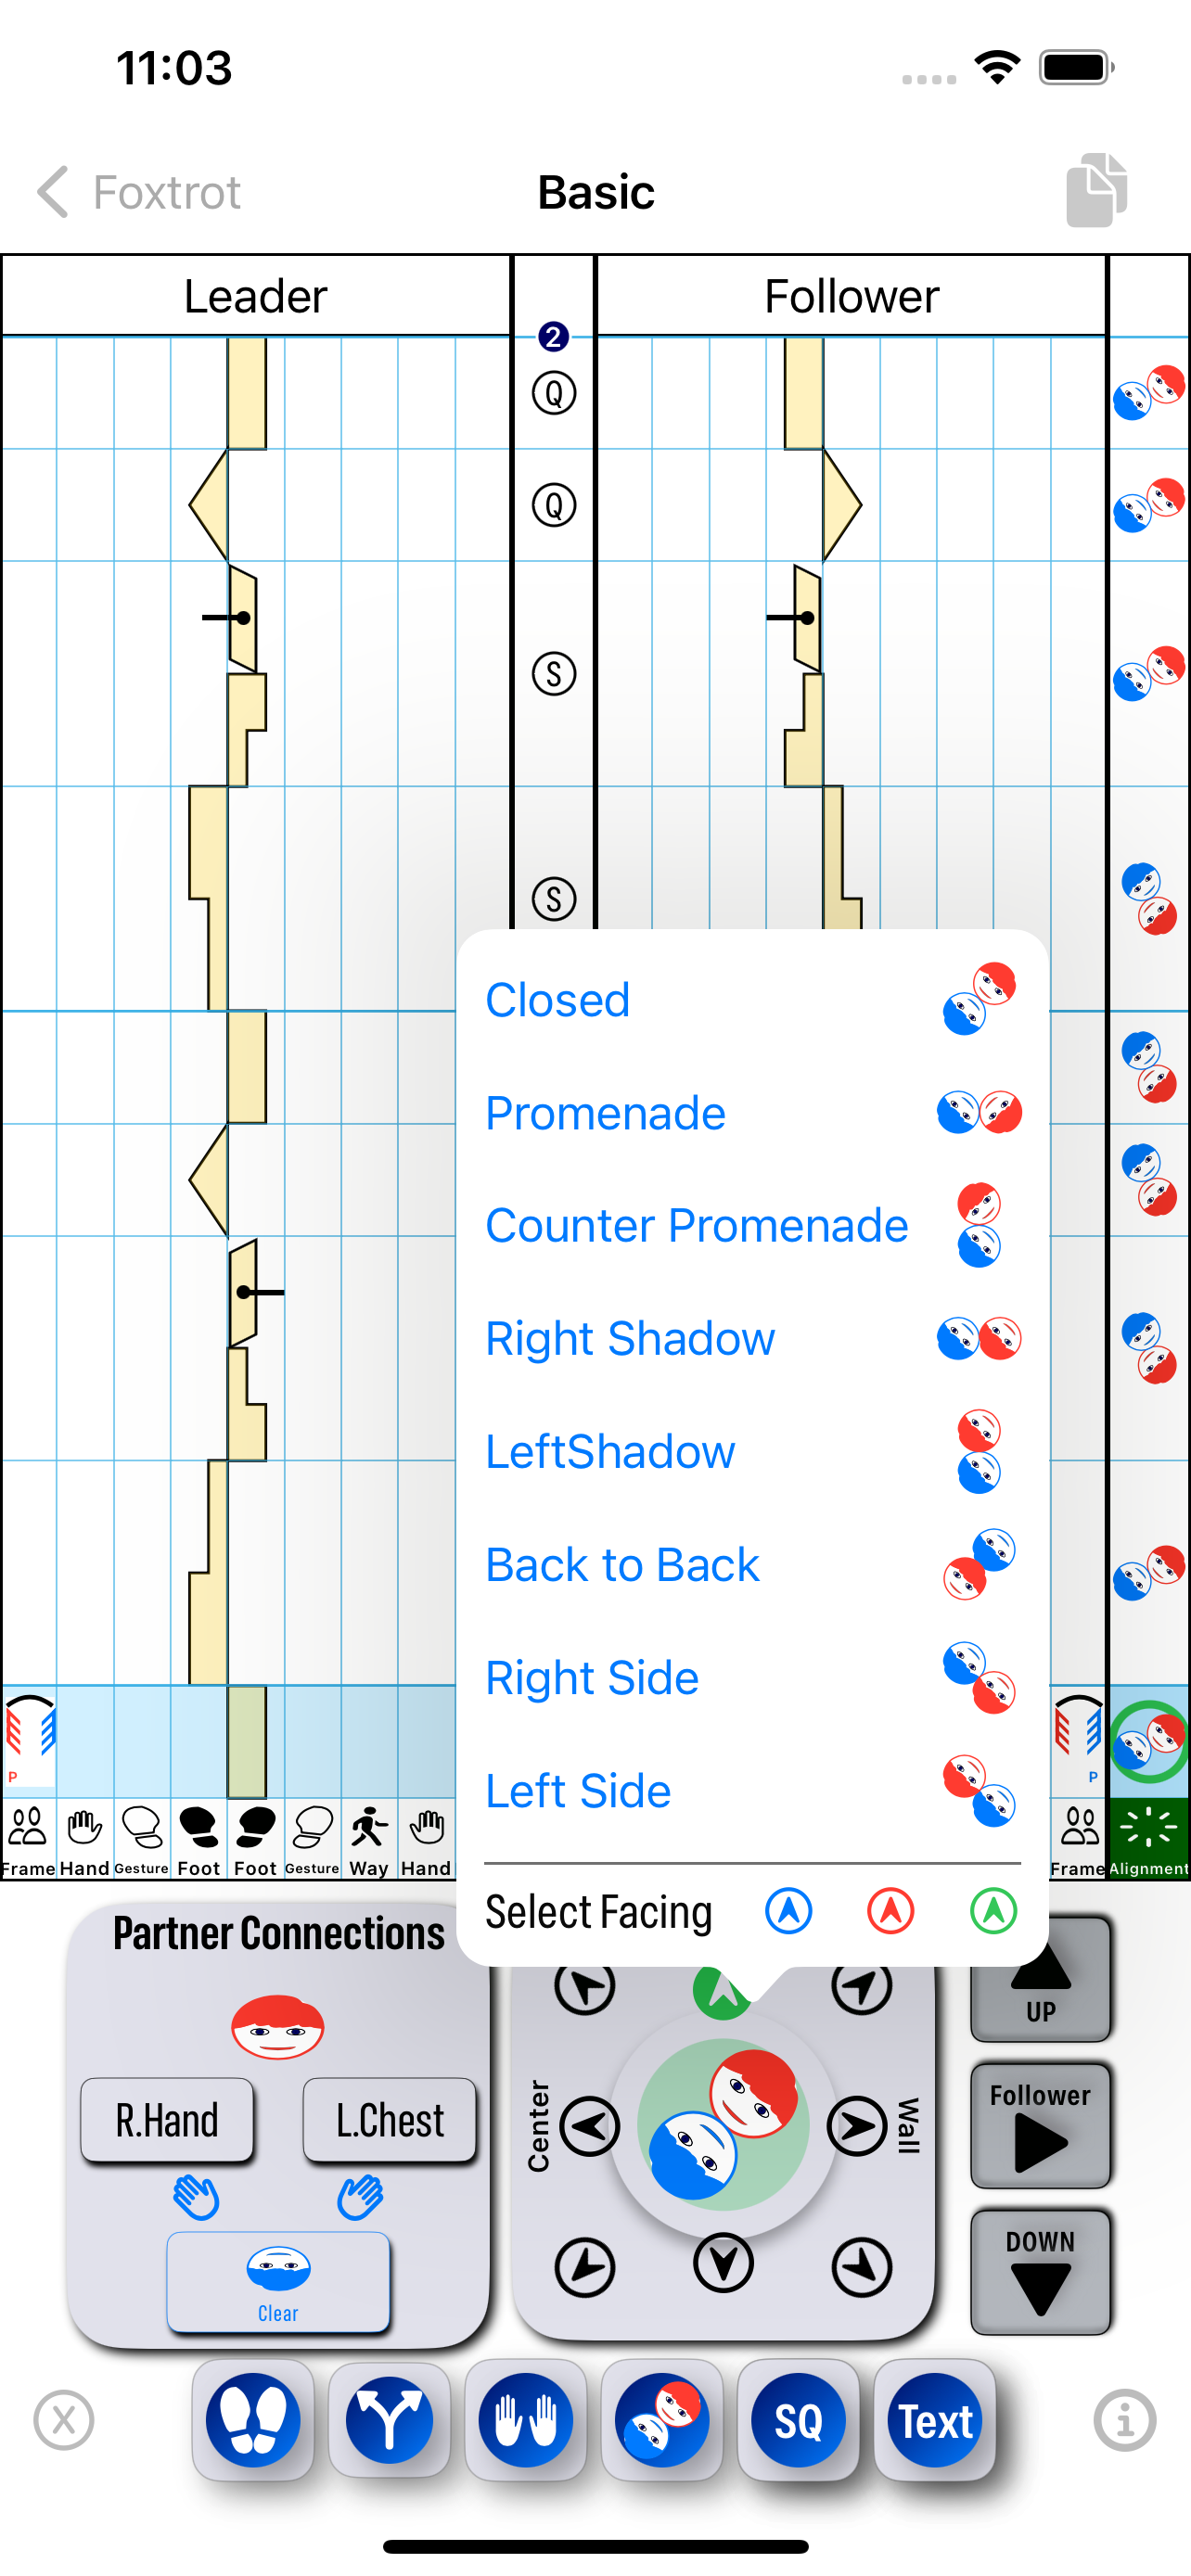
(ii) Tap on the heads on Alignment Notation pad. A pop-up menu shown in Figure 2 appears with a list of common alignment options. Select the alignment from the list. A green circle appears around the alignment heads in the alignment column. The selected alignment is recorded as notes in the text view.
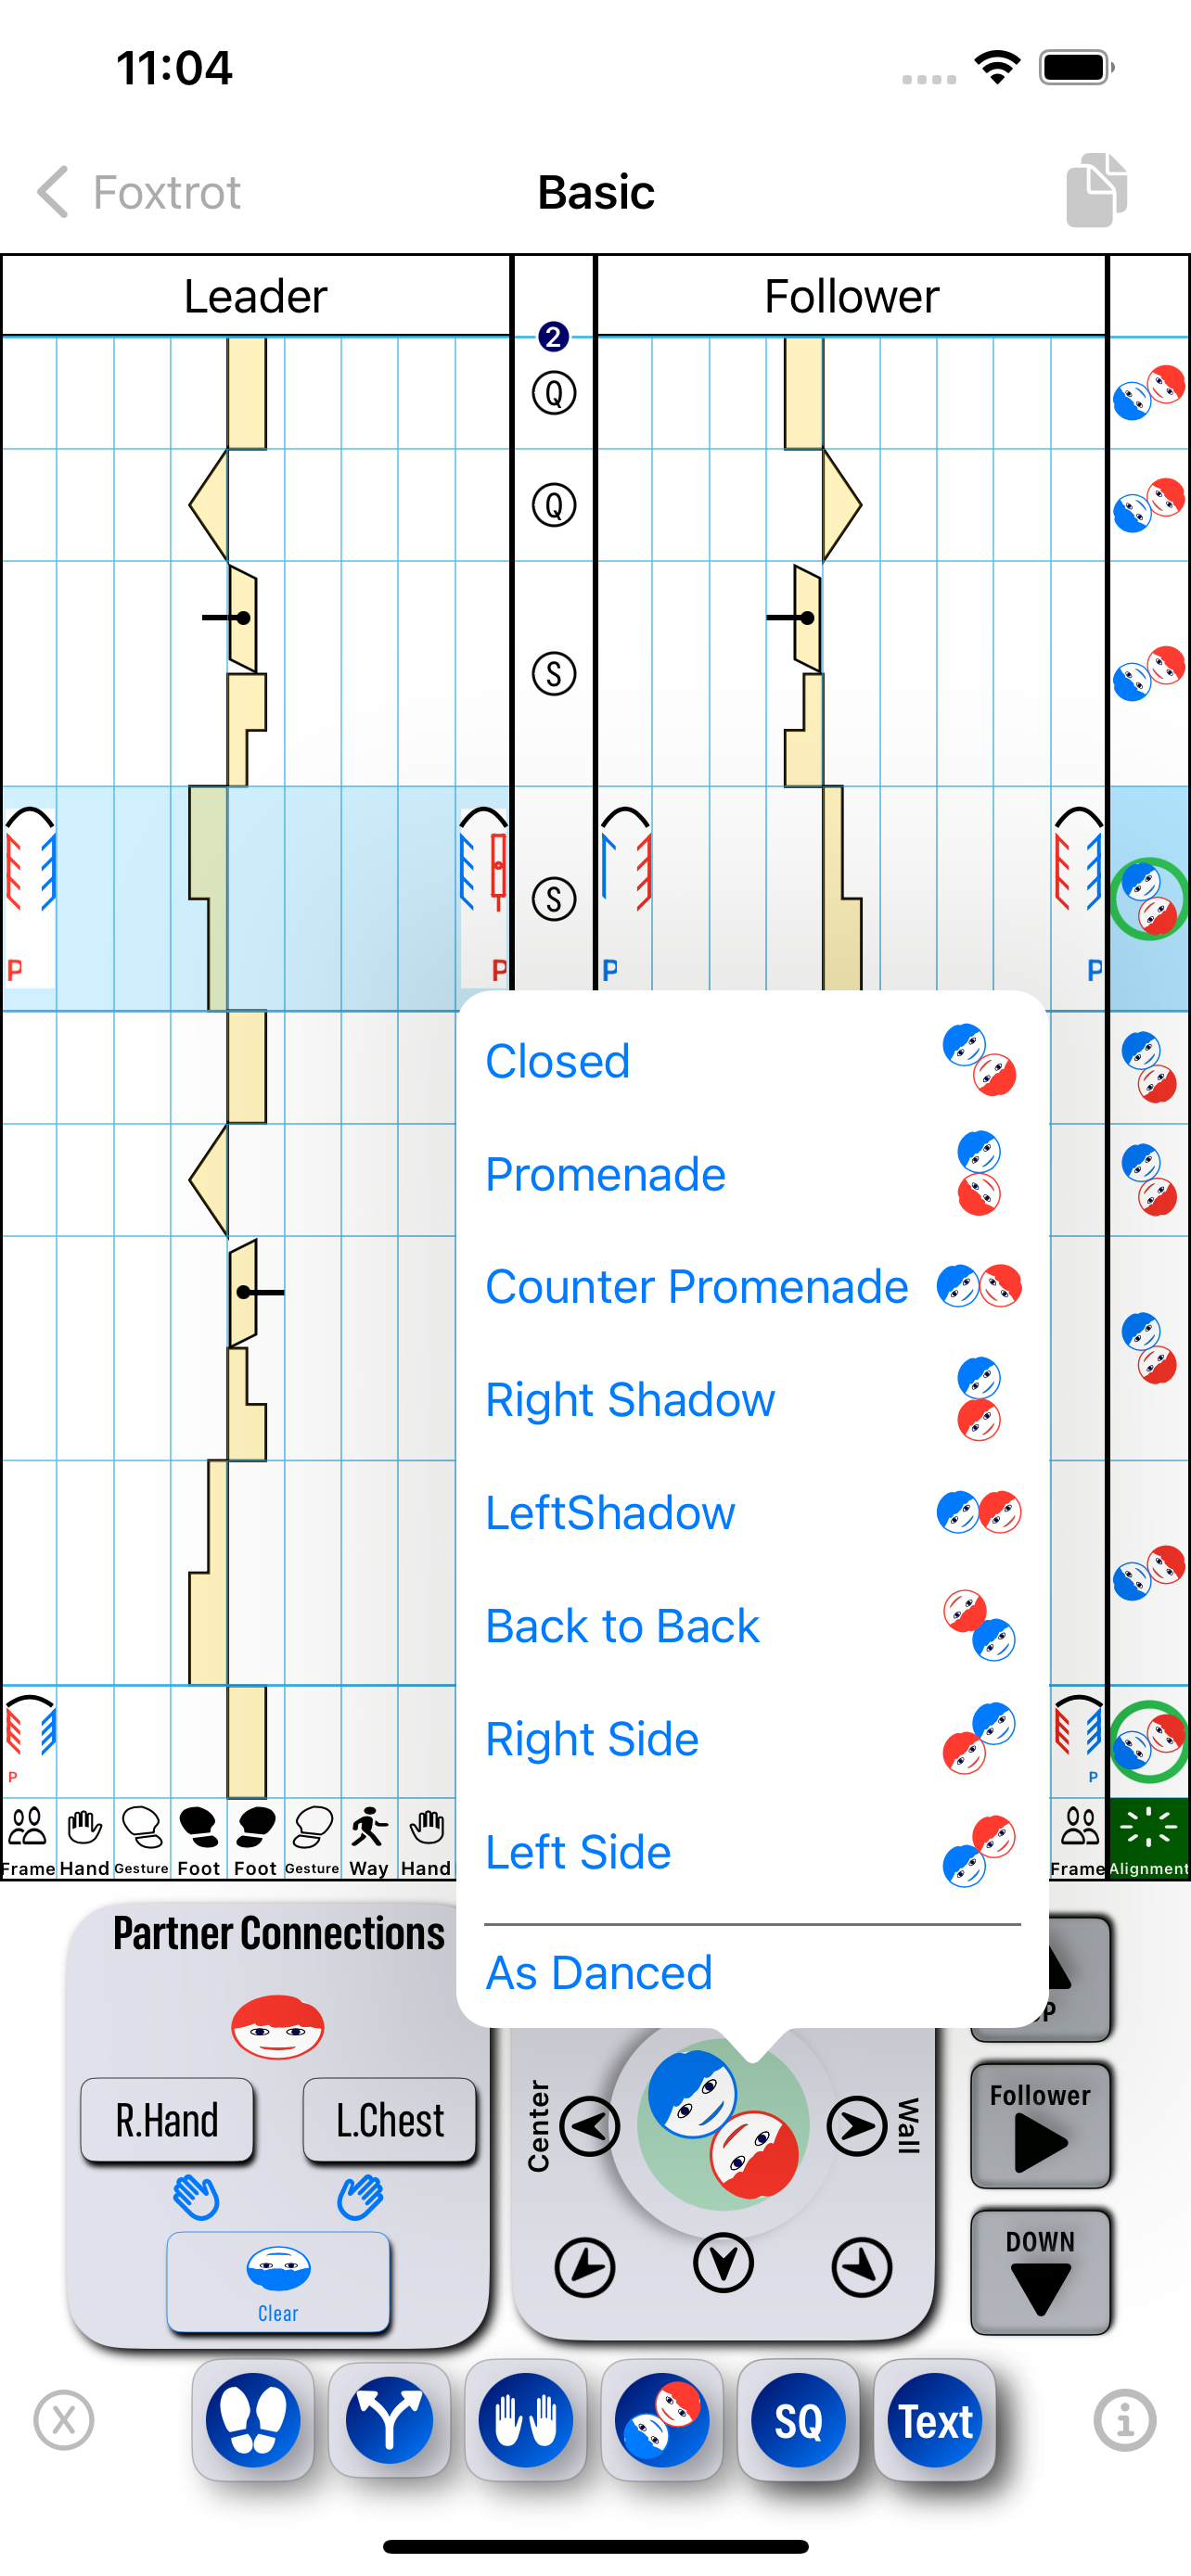
Dancers Occupying the Same Space: The Labanotation score provides guidance to the dancers as to the step directions and turns on the dance floor. Occasionally, some of the notations may not prcise and as a result the dance partners may occupy the same space on the dance floor! The app calculates such positions and if it finds one it puts an orage circle around the dancer heads in the alignment column. If you see an orange circle try to modify the notation so that it disappears or make a note of it in the text view.
The hand connections are notated by the control pad on left of the Alignment Notation pad. Follow the steps below to notate the connections.